At Plunge Pools Melbourne, we take the stress out of pool installation. Our premium, durable plunge pools are made to fit backyards of every size — and we manage the entire process, from delivery right through to installation.
In this guide, we’ll walk you through exactly how the precast plunge pool installation process works — step-by-step, with no surprises. Excited to get started? Let’s dive in.
Why Precast Plunge Pools?
When designing any solution—whether a digital product or a backyard feature—the goal is the same: simplify the experience without compromising on quality. That’s exactly what precast plunge pools do.
They’re engineered for efficiency, cost-effectiveness, and ease of integration into real homes, real backyards, and real lifestyles.
1. Fast Installation
Traditional pools require complex coordination—excavation, concrete curing, weather delays. Precast pools eliminate most of that. Built off-site, they arrive ready to install. A crane places the unit in position. Plumbing is connected. You’re swimming in days, not months.
2. Affordable
Large-scale builds come with layered costs—materials, labour, time. Precast plunge pools are pre-manufactured to specification. You get a premium result with predictable costs and far less disruption.
3. Space-Saving & Modern
Many homes today have compact outdoor areas. Precast plunge pools are designed to maximise these footprints. Their clean forms and efficient dimensions enhance the aesthetics of small spaces—without crowding them.
4. Low Maintenance & Energy Efficient
With less surface area and a controlled internal system, these pools use less water, fewer chemicals, and less energy. That means reduced running costs and more sustainable usage over time.
Bottom line? Precast plunge pools are easier to plan, simpler to install, and more efficient to maintain. They fit modern homes—and modern lifestyles.
If you’re looking for high-quality precast pools for Melbourne homes, Plunge Pools Melbourne offers durable, stylish options designed for quick installation and lasting performance.
How to Install a Precast Plunge Pool?
Skip the long build. Here’s how a precast plunge pool gets installed—clearly, step by step.
Step 1: Pick Your Pool
- Choose size, shape, depth—whatever fits your space.
- Want built-in seating, steps, or water jets? Pick your custom features.
- Select your finish—tile, pebble, concrete.
- Not sure? Call Plunge Pools Melbourne. We’ll make it easy.
Not sure which model fits your space?
Chat with our design team for a free pool fit consultation.
Talk to Our Team Now ➔Step 2: Prep the Site
- Inspect the backyard. Check space, soil, and access.
- Excavate (if needed). A stable, level foundation is key.
- Plan the drop. Crane access is non-negotiable for smooth delivery.
Dig Smart: How Deep and Wide?
Most precast plunge pools need an excavation depth of 1.5 to 2 meters, depending on the model and base. For safe installation and backfilling, dig at least 300 mm wider and longer than the pool on all sides. Soil type matters too: clay-heavy ground may require deeper excavation or drainage planning.
Foundation Options: What’s Under Your Pool?
Your pool’s stability starts with the base. Here’s what to consider:
- Compacted Crusher Dust: Budget-friendly and quick to lay, but must be layered and compacted properly. Best for well-draining soil.
- Crushed Rock Base: Offers better drainage and structural integrity. Ideal for Melbourne’s variable soil. Apply at 100–150 mm thickness.
- Concrete Slab: The most stable option—especially for sloped or soft sites. Use a reinforced slab, 100 mm thick minimum.
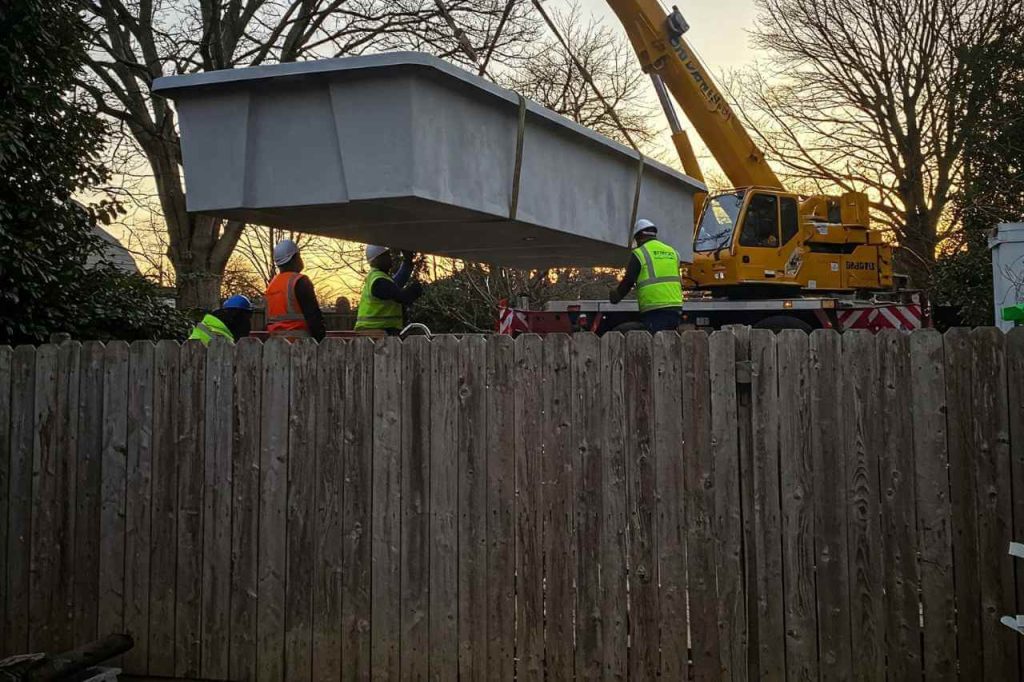
Step 3: Delivery & Placement
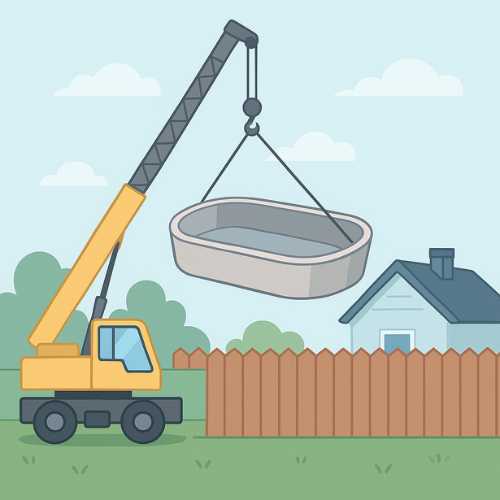
- Crane lifts and drops the pool into position. Takes a few hours—not weeks.
- Level & adjust for perfect stability and water circulation.
- Backfill with sand, gravel, or crusher dust to lock it in place.
Site Access Requirements
Planning a crane lift? Here’s what your site needs:
- Minimum Access Clearance:
- 3 meters wide
- 4 meters high
- No Overhead Obstructions: Power lines, low trees, or roofing need to be clear.
- Tight Access?
- We can assess alternate lifting options like mini-cranes or all-terrain lifts.
- Some projects may require temporary fence removal or custom delivery plans.
Step 4: Hook It Up
- Filtration system? Installed. Your water stays crystal clear.
- Lighting? LED or underwater lights wired in (if you want them).
- Heating? Optional but a game-changer for year-round swimming.
Plumbing & Electrical Setup
A plunge pool isn’t just a shell—it’s a system. Here’s what typically goes in:
- Inlet and Outlet Pipes – Direct water flow in and out of the pool.
- Pump and Filtration System – Keeps your water crystal clear (often hidden in a nearby service box).
- Optional Add-ons:
- Heat Pump – Perfect for year-round swimming.
- LED Lighting – Stylish and functional.
- Saltwater or Mineral Chlorinators – For smoother, gentler water.
According to the Victorian Building Authority (VBA), all electrical work near pools must comply with Australian standards, including AS/NZS 3000:2018 for safety and wiring.
Step 5: Final Checks & Water Fill
- Inspect everything. No leaks, no issues.
- Fill it up. Balance the pH and get chlorine levels right.
- Finishing touches. Landscaping, decking, fencing—whatever makes it yours.
That’s it! Your pool is ready. Fast. Easy. Done right.
DIY vs. Professional Installation: Which One Actually Makes Sense?
Thinking about installing your own precast plunge pool to save some cash? Sounds good in theory. But is DIY really the best move? Let’s break it down.
DIY Installation – Is It Worth It?
Pros:
- Cheaper upfront. No labour costs. Just you, YouTube, and hope.
- Your schedule, your rules. Work at your own pace.
- Bragging rights. You did it yourself (if you pull it off).
Cons:
- HIGH RISK. You’re dealing with excavation, plumbing, electrical work, and a crane—one mistake, and you’re in deep water (literally).
- Regulations are a nightmare. Permits, safety codes, compliance—it’s a legal minefield.
- No warranty. Screw up, and you void your manufacturer guarantee. Fixing mistakes costs more than hiring pros in the first place.
Verdict: If you’re a construction pro, maybe. Otherwise? Hard pass.
Professional Installation – Why It’s the Smarter Choice
Pros:
- Zero stress. Experts handle EVERYTHING—from excavation to fencing.
- Safe & compliant. Pros follow Australian building codes, so no legal headaches.
- FAST. Pool’s in within days, not weeks.
- WARRANTY. Mistakes? Not your problem. Workmanship is guaranteed.
Cons:
- Higher upfront cost. You’re paying for experience, speed, and peace of mind.
Verdict: If you want it done right, fast, and stress-free, hire professionals. Period.
Bottom Line? DIY saves a little now but costs a LOT later.
Client Experiences
“I originally looked into DIY to save money, but after seeing how complex the crane setup and permits were, I’m glad I went with Plunge Pools Melbourne. It was done in three days start to finish.”
— Natalia N., Brighton VIC

Post-Installation & Pool Setup Guide
You’ve got your precast plunge pool installed. Looks amazing. But if you want it to stay that way, here’s exactly what you need to do.
Step 1: First-Time Water Treatment
- Test everything. pH, chlorine, alkalinity—get the levels right.
- Balance the water. Add the right chemicals so you don’t swim in a science experiment.
- Run the filtration system. 24 hours straight before you take the first plunge.
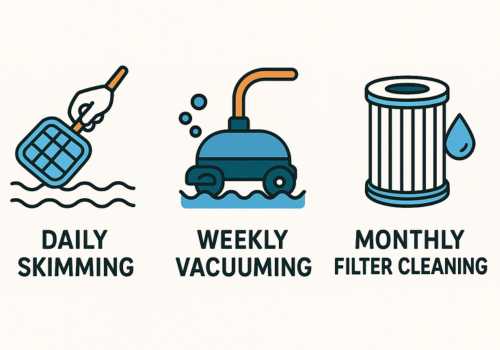
Step 2: Regular Maintenance
- Skim debris daily. Leaves? Bugs? Get them out.
- Vacuum weekly. Keeps the bottom clean and your water clear.
- Clean filters monthly. If they clog, your pool turns into a swamp.
- Check water levels. If it’s low, top it up. If it’s too high, adjust.
- Winterize (if needed). Not swimming in winter? Prep the pool so it doesn’t turn into a pond.
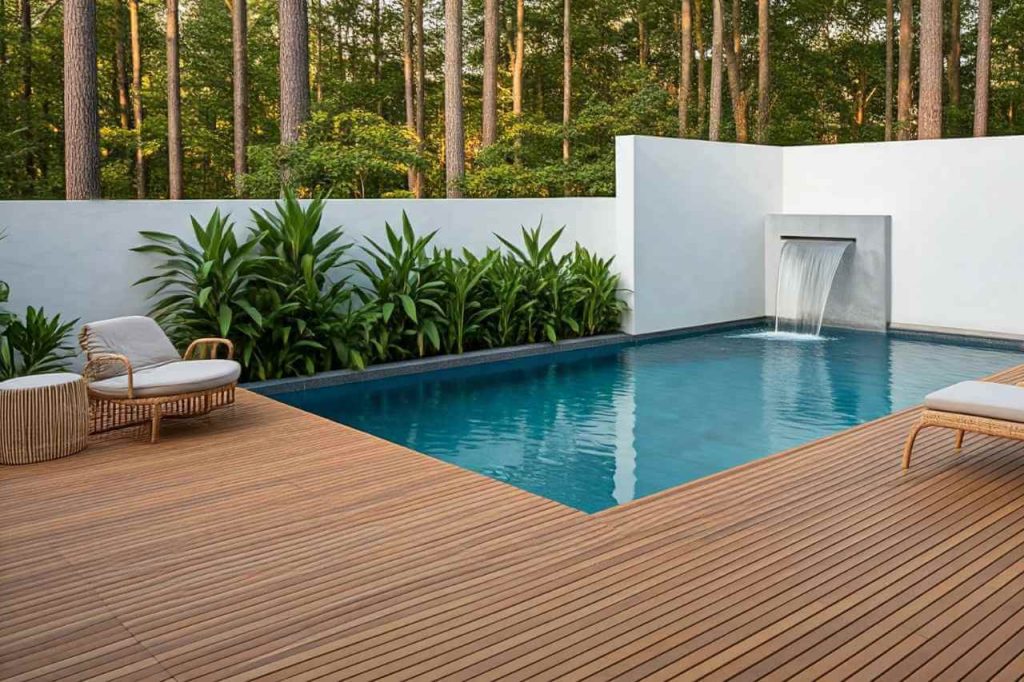
Step 3: Make It Look Next-Level
- Decking, pavers, furniture. Turn your pool into a backyard oasis.
- LED lighting. Night-time swims? Yes, please.
- Heating system. Want year-round swimming? Install one. You’ll never regret it.
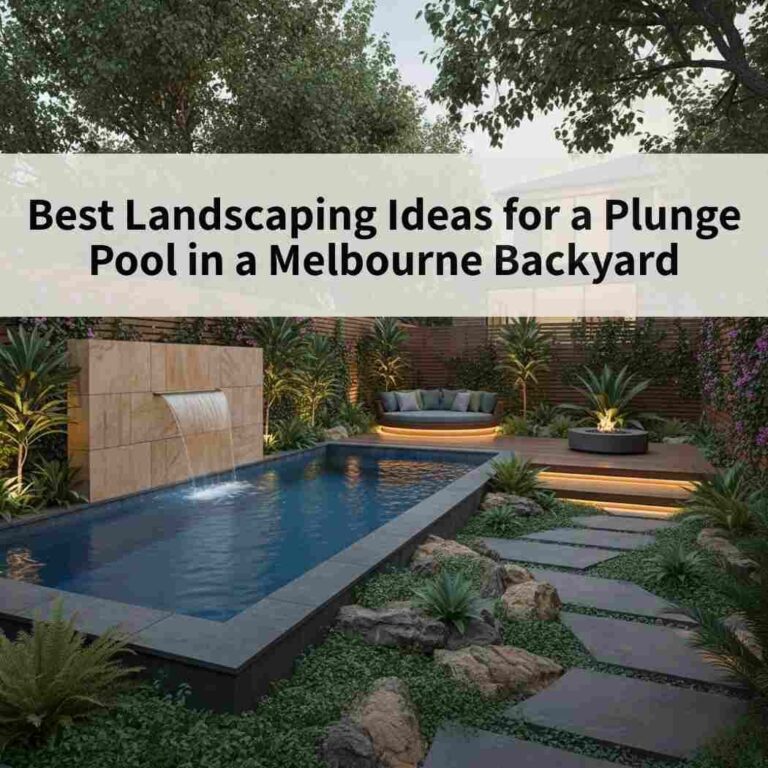
Want more inspiration? Explore landscaping ideas to complement your precast pool and transform your backyard into a complete outdoor retreat.
Eco-Friendly Pools That Save Money & The Planet
Want a sustainable pool that doesn’t wreck the environment (or your wallet)? Here’s how to make your precast plunge pool as energy-efficient as possible.
1. Use Energy-Efficient Equipment
- Variable-speed pumps – Use 80% less energy than standard ones.
- Solar-powered heating – Keeps your pool warm without jacking up your electricity bill. According to Sustainability Victoria, pool pumps can account for up to 30% of a household’s energy bill, and switching to energy-efficient equipment—like variable-speed pumps and solar heating—can significantly reduce running costs and environmental impact.
- LED pool lights –Last longer, use less power, and look amazing.
2. Reduce Water Waste
- Pool covers – Cuts evaporation by up to 50% (less refilling = lower water bills).
- Water-efficient filtration – Minimises backwashing (saves thousands of liters a year).
- Rainwater collection – Free water? Use it to refill your pool naturally.
3. Choose Sustainable Materials
- Recycled glass tiles – Eco-friendly, durable, and stylish.
- Composite or bamboo decking – Stronger, more sustainable than traditional wood.
- Mineral or saltwater systems – Less chlorine, less chemicals, more natural.
Conclusion
You want a fast, affordable, and low-maintenance pool? Precast plunge pools are exactly that. Quick installation. Modern design. Eco-friendly perks. No brainer.
About Plunge Pools Melbourne
At Plunge Pools Melbourne, we specialise in premium precast concrete plunge pools that are built to fit seamlessly into any modern Australian backyard. Whether you’re dealing with a tight courtyard, a sloped block, or want something custom-built for your outdoor space—we offer both above-ground and in-ground pool solutions tailored to your needs.
With over 20 years of experience serving Melbourne homeowners, we’ve seen and solved it all: clay soils, narrow access paths, heritage overlays—you name it. This guide reflects the depth of our local know-how, so you can skip the headaches and get straight to enjoying your pool.
Our team combines skilled tradespeople, streamlined project management, and transparent pricing to deliver results that last.
Ready to transform your backyard into a modern oasis?
Let Plunge Pools Melbourne handle everything—from expert site prep to flawless installation.
Get Your Free Personal Quote Today ➔Frequently Asked Questions
1. Do precast plunge pools need excavation?
Yes. No solid base = no stable pool. Some sites need minimal digging, others need full excavation for proper support and drainage. A pro assessment ensures you get it right the first time.
2. What kind of foundation does it need?
Level and stable—non-negotiable. Options: compacted sand, crushed rock, or a concrete slab. A bad foundation = cracks, shifting, and regrets. Get it done right.
3. Do I need a crane for installation?
Almost always, yes. A crane lifts the pool into place fast and safely. In rare cases, a forklift or small excavator might work if access is easy. Crane hire costs depend on pool size and site conditions.
4. Can I relocate my precast plunge pool later?
Yes. But it’s not cheap—you’ll need excavation, crane hire, and a new site setup. If you think you might move it in the future, talk to your pool provider about flexible installation options.
5. What if my yard has poor access?
If crane access is limited, we’ll assess alternative lift methods. Sometimes, we use an all-terrain or mini-crane. Narrow sites may require partial dismantling of fencing or landscaping, which we’ll handle as part of your quote.
6. Can I upgrade the pool later (e.g., heating or lighting)?
Yes—most add-ons can be retrofitted, but it’s cheaper to install them up front. Pre-wire or pre-plumb if you think you’ll want these features later.
7. How long does the full process take?
From quote to swim: typically 2–4 weeks.
- 1 week for site inspection and approvals
- 1–2 days for excavation
- 1 day for crane installation
- 1–2 days for plumbing/electrical
- 3–5 days for finishing touches